Jerry Nicholson’s Favorite ‘Smoked Egg Dip’
Smoked Egg Dip
Jerry Nicholson’s Favorite Dish Of Mine…
Dips are a must at parties, and Smoked Egg Dip is a very different and a very delicious dip to serve to your guests!!! I make this, since it is so very easy to make, and it’s always a hit! However, my friend and local Dallas Bartending Royalty, Jerry Nicholson, just devours it and asks to take the rest of it home…. That’s what you want when you are working to serve your friends….
Serve as a dip, a topper, or replace that mayonaised glob on your deviled eggs with this Smokey Treat!
Get out the Blender folks, this one is simple:
Ingredients:
6 Hard Cooked Eggs, chopped
1 1/2 tsp Liquid Smoke
1/2 Tbsp Lemon Juice
1 tsp Yellow Mustard
1 Tbsp Worcestershire Sauce
1 Drop Tobasco Sauce (Original)
1 tsp Minced Onion
1/4 tsp Black Pepper, ground
3/4 Cup Mayonnaise or Miracle Whip (I use Mayonnaise)
1 Tbsp Butter, softened
Instructions:
Combine all of the ingredients in your Blender and blend until smooth.
Yields: 1 pint.
As you can see, dips are So Versatile! Enjoy this wonderful recipe, Smoked Egg Dip from JW8!
Soft Cheddar Pretzel Bread
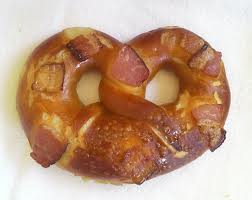
Cheddar Pretzel Bread
If you’re a multi-tasker, then this Recipe has you written all over it! You can simply make just about anything with this simple dough recipe; Pretzels, Pretzel-Dogs, Burger Buns, Kolaches, Sliders, Soup Bowls. . . . . . . . the list goes on and on…..
Get creative! Baking Bread is awesome and So Easy….. Makes your house smell great, pleases appetites and keeps for days (if it does go stale, then you can make Bread Pudding, Stuffing, Breading….. once again, endless) Needless to say that your money is well spent on this Recipe of all Recipes!
Many Movie Theaters use the smell of Freshly Baked Bread to sell Popcorn! Restaurants have always been tempting appetites with a properly placed bakery… Homes feel loving, clean and friendly when they smell like Momma’s been Baking In That Oven! Ironically, few people actually bake bread without a bread maker! Once you realize how easy this is, you’ll save your money for a pair of shoes!
Start with the Base Recipe and then hit the Variations Below:
Base Recipe:
1 1/2 Cups Flour
2 tsp Baking Powder
1/2 tsp Salt
1 tsp Sugar
2 Tbsp Butter or Margarine
1/2 Cup Cheddar Cheese, shredded (I use 2 ounces of Mild Cheddar)
2/3 Cup Milk
1 Egg, beaten
1 1/2 tsp Coarse Salt (Kosher or Sea Salt works great)
Preperation:
Combine the Flour, Baking Powder, Salt and Sugar in a Medium Bowl. Cut in Butter/Margarine with a Pastry Blender until the mixture resembles coarse meal.
Tip: If you don’t have a Pastry Blender, hold two Butter Knives together and ‘Cut’ through the Solids until they resemble coarse meal!
Add the Cheese and Milk, stirring until the dry ingredients are just moistened. Turn the dough out on to a lightly floured surface and knead about 12 times.
Divide your dough in half and roll each half in to a 12X8 rectangle. Cut the dough lengthwise in to eight 1-inch strips.
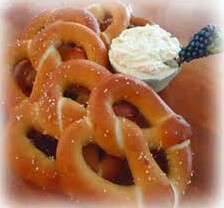
Twist each strip in to a Pretzel Shape! Brush with the beaten Egg and sprinkle with Coarse Salt.
Place on a lightly greased baking sheet and Bake at 400 Degrees (F) for 15 minutes or until golden brown. Cool Pretzels for a few minutes on wire racks and Serve Warm.
Makes about 16 Soft Cheddar Pretzels.
Variations:
This part of the creative process is not an exact science! If you want Boring Perfection, you can achieve that as well…. Still continue cooking at 400 Degrees (F), but the cooking times will vary to get them golden brown depending upon the sizes…
Pretzel Bread:
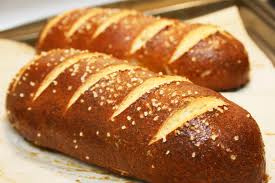
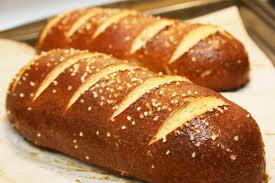
After dividing your dough in half, form them in to Two Loaves and slice them a few times with a sharp knife before brushing with the Egg and sprinkling with Salt. Your Baking Time here will usually be about 25 – 35 minutes…. Bake them on a lightly greased baking sheet and Not in a Loaf Pan to get that Artisan Look and awesome crust!
Pretzel Bowls for Soup:
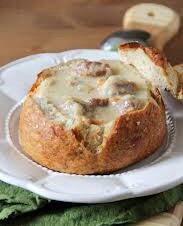
Divide your dough in to four parts and shape them by hand in to round loaves. Brush with the Egg and sprinkle with the Salt… Baking time is usually around 15-25 minutes. Let them cool completely. Using a knife, cut the tops off and hollow out the centers. Fill with your favorite soup and serve along with the Tops! Always a Favorite!
Pretzel Dogs:
After cutting the two halves in to strips, wrap your ‘Dogs’ with the strips and Brush with the Egg and sprinkle with the Salt. I use ‘All-Beef’ franks for this since they seem to be less greasy than the Processed Meat Franks! It’s just my preference! Baking time is 15-25 minutes….
Burger/Sandwich Buns:
Follow the steps for the Soup Bowls, but this dough makes Eight Buns and baking time is reduced to 10-20 minutes! Once cooled, slice in to two halves and serve up some grilled Burgers, Chicken or Barbeque!!!
Maple Bacon Breakfast Pretzel
After making your Pretzel Shapes, brush with the Beaten Egg but Do Not sprinkle with the Coarse Salt! Rather, top them with pieces of ‘par-cooked’ Bacon and pop them in to the oven using the cooking times for the Pretzel Recipe! The Bacon flavors these Pretzels, and when served with warm Maple Syrup, they are just too good!!!
Enjoy this Multi-Tasker from JW8!!!
Potatoes Lyonnaise
Potatoes Lyonnaise
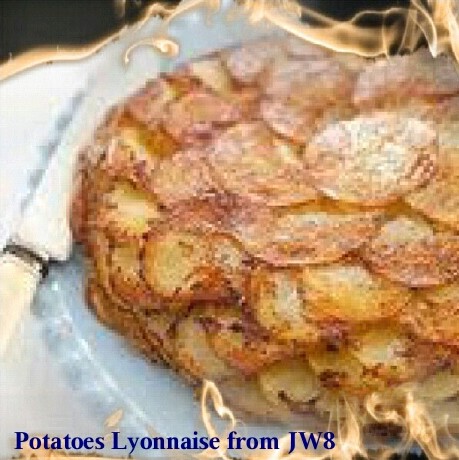
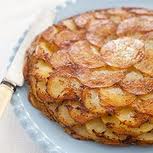
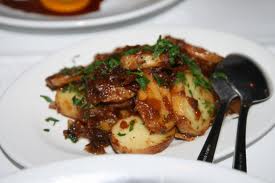
Potatoes Lyonnaise is an old-fashioned recipe for making ‘Left-Overs’…. Basically, you would use Potatoes from the prior night’s meal and cook them in lots of Butter and Onions until they resemble today’s Fried Potatoes! Don’t get me wrong, they have taken an elegant presentation in a formal ‘Meat and Potatoes’ kind of meal, and by spiraling them in a skillet you get a beautiful dish that won’t last long….
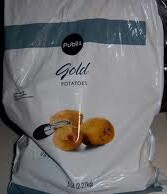
To simulate being ‘Left-Over’ Potatoes, we will begin cooking them in the microwave. Not just a time saver, this is actually the preferred method for Par-Cooking these Yukon Golds! This recipe I lifted years ago from PBS’s, America’s Test Kitchen, and it just can’t be beat!
Serves 3 to 4 Adults as a Side Dish.
Potatoes Lyonnaise
Ingredients:
3 Tbsp Butter, unsalted
1 Large Onion, halved pole to pole and sliced 1/4 inch thick (about 3 Cups)
3/4 tsp Kosher Salt (or 1/2 teaspoon table salt)
2 Tbsp Water
1 1/2 Pounds Medium Yukon Gold Potatoes, peeled and sliced crosswise in to 1/4 inch rounds
1/4 tsp Black Pepper, ground
1 Tbsp Fresh Parsley Leaves, minced
Procedure:
1. Heat 1 Tablespoon Butter in a 12-inch heavy, non-stick skillet over Medium-High heat. When foaming subsides, add Onion and 1/4 teaspoon Salt and stir to coat. Cook, stirring occasionally, until Onion begins to soften, about 3 minutes. Reduce heat to Medium and cook, covered, stirring occasionally, until Onions are light brown and soft, about 12 minutes longer. About halfway through the cooking time, when the pan gets dry, Deglaze with Water. Transfer to bowl and cover. Do Not Wash Skillet.
2. While Onions cook, Microwave 1 Tablespoon Butter on High Power in a large Microwave-Safe bowl until melted, about 45 seconds. Add the Potatoes to the bowl and toss to coat with the melted Butter. Microwave on High Power until Potatoes just start to turn tender, about 6 minutes, tossing halfway through cooking time. Toss Potatoes again and set aside.
3. Melt the remaining Tablespoon of Butter in the ‘now-empty’ skillet over Medium-High heat. When foaming subsides, add the Potatoes and shake the skillet to distribute evenly. Cook, without stirring, until browned on the bottom, about 3 minutes. (Don’t worry about over-browning the Potatoes, that’s what you want in this dish) Using a spatula, stir the Potatoes carefully and continue to cook, stirring carefully every 2 – 3 minutes, until Potatoes are Well-Browned and Tender when pierced with the tip of a paring knife, usually 8 – 10 minutes more. Sprinkle with the remaining Salt and Pepper.
4. Add the Onions back to the skillet and combine together. Cook until the Onions are heated through and the flavors have melded, 1 -2 minutes. Transfer to a Large Plate, sprinkle with Parsley and Serve.
4. (Option #2 ~ My Choice) Complete step #4 above up to the point of transferring to a Large Serving Plate. Instead, place the skillet in to a pre-heated HOT oven, 475 Degrees (F), and let cook for an additional 15 minutes, or until it is bubbling along the sides (a cast iron skillet works fabulous here). Remove from oven and let cool slightly to avoid burning yourself when transferring to a Serving Plate. Place your Large Plate on top of the skillet, and using oven mitts, flip the skillet over on to the plate until the Potatoes Lyonnaise has released on to the serving area. Once inverted on to the plate, sprinkle with the Parsley and Serve! If using this last option, then carefully placing the Potatoes in a spiral fashion during step #3 will give you an awesome presentation. The easiest method for this is to combine your Onions and Potatoes in a bowl and then Spiral Layer them in to the skillet, keeping in mind how it will look when served. You won’t be able to stir after this point, so make sure that they are fork tender and seasoned to your taste beforehand!
Enjoy serving Meat and Potatoes to guests! Potatoes Lyonnaise with my Personal Twist from JW8!
Coffee Can English Muffins
Coffee Can English Muffins!!!
Round Loaves of Delicious 100% Bran Bread
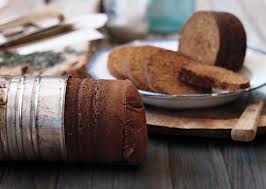
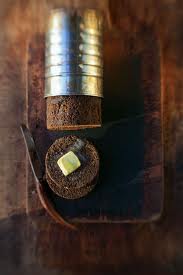
This recipe is incredible, although you can actually bake any kind of bread in a ‘One Pound’ coffee can! Round Loaves are beautiful and look awesome as a homemade gift during the Holidays….. I am giving you a recipe for Bran Bread because it works divinely, and it’s thick consistency is great when you slice it up and grill it with butter, serving it hot for breakfast! Healthy, Healthy, Healthy!!!
Bran Bread by Patricia VanGorkum:
Ingredients:
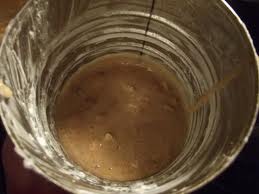
You will be using ‘One Pound’ metal coffee cans to bake this bread! Make sure that they are extremely clean and well-greased……
3 Cups Warm Water
1 Package Yeast
3/4 Cup Melted Butter
3/4 Cup Sugar
1 tsp Salt
1 Cup All Bran Cereal, 100% Bran
7-8 Cups Flour (I use 8)
Procedure:
Sprinkle Yeast in the Warm Water and stir it up a bit. Leave sit for a few minutes to activate the yeast…
Melt Butter and add Sugar, Salt and the Bran. Add this to the Yeast/Water and begin to add your Flour one cup at a time.
Let Rise to Double. It is best to lightly cover your bowl with a thin tea towel and place it in a warm, dark environment to rise. Once it has risen, divide your bread dough in to Five 1-Pound Coffee Cans (Well-Greased!), cover lightly again and let the dough rise in the cans.
Heat your oven to 350 Degrees (F).
Bake your loaves for 45 minutes at 350 Degrees and then remove to a rack to cool… If you have headed my warning to grease those cans well, the loaves will easily come out in a great looking condition. A butter knife ran around the edges can be a great help here.
~~~~~~~~~~~~~~~~~~~~~~~~~~~~~~~~~~~~~~~~~~~~~~~~~~~~~~~~~~~~~~~~~~~~~
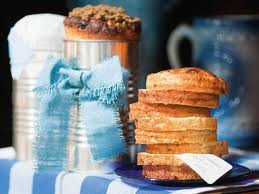
The smell will make your mouth water, as any home-baked bread will do! Delicious as is, but when sliced, buttered and grilled in a skillet, these become a delicious treat as Home-Made English Muffins…..
Also, to make a beautiful gift, wrap a cooled loaf (unsliced) in cellophane and tie it up with some cotton ribbon!!! Include the recipe for them too….
That’s Coffee Can Bread from JW8!!! Enjoy!
Tzatziki Sauce
Tzatziki Sauce
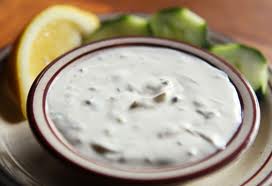
A Greek sauce/dip made from yogurt and cucumber. So easy to make and a must for Gyros, it is also a great snack served with Pita Chips!
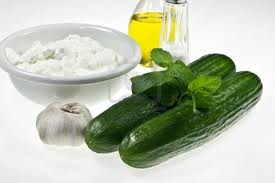
Ingredients:
Yogurt
Peeled and Seeded Cucumber
Garlic
Extra Virgin Olive Oil
(Optional)
Lemon
Dill
Salt/Pepper
Procedure:
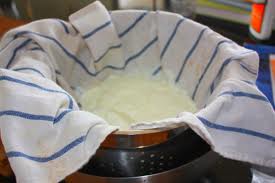
Begin by placing the Yogurt in a cotton tea towel and suspend over a vessel in the refrigerator for 2 hours. During this time, peel and seed your Cucumber.
Place the thickened Yogurt, Cucumber, Garlic and a splash of EVOO in to your food processor and give it a few spins! I love mine with Lemon Zest/Juice, Fresh Dill and Salt & Pepper!
Enjoy with your Homemade Gyros from JW8!!!
HomeMade Lamb Gyros
Gyros
These fabulous Greek Sandwiches can be made at home

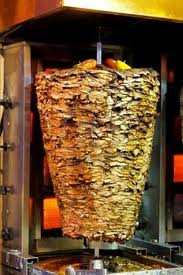
Gyros are those fantastic Greek Pita Sandwiches that we watch as they cut our Lamb from a spool of rotating yummy-ness….. I have had this recipe in my collection for years and love them just as much as I do the Restaurant version of this classic…
Best when made on an outdoor rotisserie, the option to make them in your indoor oven will not disappoint…. Let’s get started!
Ingredients:
1 Medium Onion
1 Tbsp Garlic
1 Tbsp Rosemary
1 Tbsp Thyme
1 Tbsp Marjoram
2 Pounds Ground Lamb
Prepare at least 2 hours in advance:
Chop the Onion in a Food Processor and then place in a cotton towel and squeeze all of the moisture out of it. In the food processor, puree the Onion with all of the Spices and Lamb.
Transfer this mixture to a large sheet of plastic and roll it up tight and rewrap. Place this ‘log’ in the refrigerator and chill at least 2 hours.
Choose a Cooking Method:
Rotisserie:
Set all gas grill zones on medium. Double-Thick your aluminum foil and shape as a tray large enough to catch all of the drippings from the ‘log’. This also serves to block the direct heat.
Cook 15 minutes on High Heat to begin to sear the exterior of the ‘log’. Continue cooking over medium heat for 20 – 35 minutes, until you reach an internal temperature of 165 degrees (F). Turn off the heat and continue cooking until you reach a final temperature of 175 degrees (F).
Oven:
Using a standard ‘Loaf Pan’, place the meat mixture in to the pan and press flat. This pan should sit in a water bath by using a larger pan with at least an inch of water.
Preheat your oven to 325 degrees (F). Cook the meat for 30 minutes with a brick wrapped in foil on top of it to press it and add pressure. After 30 minutes, pour off any fat while hot and continue cooking for an additional 30 – 45 minutes until completely cooked.
Serve:
The meat is to be thinly sliced and served in a warm pita with Tzatziki Sauce (which I will post next) and typically sliced onion and tomatoes!
Enjoy these terrific Gyros from JW8!

