Monthly Archives: November 2012
Homemade Thin Crust Pizza Perfection
Homemade Thin Crust Pizza
Perfection every time and you will never find an easier recipe for the dough!
I am still amazed at how easy it is to make this Pizza Dough using a food processor….. I remember as a child waiting for the dough to rise, etc., etc….. There is no waiting on this and it tastes better than the best Pizzeria can make for you! Now, this recipe is just for the Pizza Dough, but isn’t that the point of making Pizza???? Having it different every time, and certainly most people want it their way.
Thin Crust Dough is probably the most widely known type of pizza dough and is usually used for traditional pizzas throughout Europe and in the United States. Thin crust pizza bases are perfect for pizza lovers who prefer to taste more of the sauce, cheese and other toppings and don’t want to be filled up too quickly. It’s usual to make thin pizzas larger than thick based pizzas.
Ingredients:
1 Envelope Dry Yeast
1/4 tsp Sugar
3/4 Cup Lukewarm Water
1 3/4 Cups Unbleached Plain Flour
1/2 tsp Salt
Step by Step Procedure:
1. Combine 1 envelope of Dry Yeast, 1/4 teaspoon of Sugar and 3/4 cups of Lukewarm Water. Mix a little and let sit for 6 – 8 minutes.
2. Combine 1 3/4 cups of Unbleached Plain Flour with 1/2 teaspoon of Salt in a bowl or food processor.
3. Pour the water combination in to the bowl (or food processor) and mix until ready to knead (around 30 seconds in a food processor). If using a bowl, mix with a spoon until you have a neat ball.
4. Prepare a surface by lightly sprinkling with flour. Turn out dough and knead for around 2 – 3 minutes. Lightly cover your fingertips with flour if the mixture is a little sticky.
5. Roll out by hand for a 12″ base.
6. Place in a lightly oiled 12″ oven pan. Press out dough to form a slight lip.
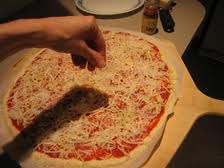
7. Prepare and apply your sauce and toppings of choice.
8. Cook in a pre-heated oven (500 degrees F) for 8 – 12 minutes. (Times vary based on different ovens. Convection ovens will be quicker!).
9. Remove from oven, slice and share with your favorite friends and family…
This recipe becomes amazing when using your food processor! No time at all….. In a convection oven, mine always comes out at 9 minutes exactly no matter what the toppings… This pizza definitely tastes like you spent all day on the dough, but you can whip this baby up to perfection in less than an hour… What could be better?
Enjoy your pizza from JW8 !!!
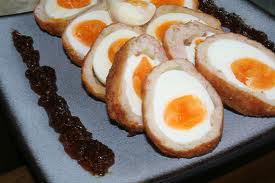
Mrs. McLennan’s Scotch Eggs
This recipe comes from the Amy Vanderbilt’s Complete Cookbook page 294 which is now binded with duct tape!!! Everyone loves Scotch Eggs, which are common place in England as are Deviled Eggs in the U.S.. You just can’t fail with this, unless you’re on a diet that is……
Mrs. McLennan’s Scotch Eggs
Amy Vanderbilt’s Complete Cookbook
Ingredients:
6 Hard-Cooked Eggs, shelled
1 1/2 Cups Bread Crumbs
1 Egg, slightly beaten
1/4 Cup Water
1 pound Sausage
Fat For Deep Frying (I left this just as it says in the old cookbook)
Here’s what to do:
Roll hard-cooked eggs in crumbs, then dip in beaten egg which has been mixed with water. Dip in to crumbs again. Let stand 15 minutes at kitchen
temperature to dry slightly.
Divide sausage meat in to 6 portions. Wrap each crumbed egg with sausage. Cover evenly and retain shape of egg.
Roll again in beaten egg and crumbs. Let dry about 15 minutes.
Fry in deep, hot fat (375 degrees F) about 5 minutes or until sausage is cooked and browning. Drain on thick paper towels. Chill. Serve whole or cut in half with salad. Makes 6 or 12 servings.
These are quite good hot, but this would be a sacrilege in Scotland! Their real advantage is that they may be made ahead of time and will keep several days in a covered dish in the refrigerator.
————————————————————————————————————————————————–
I kept the text above Verbatim to the original cookbook recipe. Nothing needs added to these. Enjoy!
Scotch Eggs from Mrs. McLennan, Amy Vanderbilt and JW8…….
Red Coconut Curry Cream
Admittedly, there are a LOT of ingredients here, but trust me that you should stay as true to the complete recipe as possible. The payoff is BIG! This sauce is served with the Lobster Scallion Shooters, which I have just posted. If you are looking to impress, then you’ve found the way in to the heart of any Lobster Lover!!! Enjoy…..
Red Coconut Curry Cream
compliments the Lobster Scallion Shooters
I estimate the Prep Time here at about 30 minutes, but might be beneficial to prepare before deep frying your dumplings…..
Ingredients:
2 ounces Sesame Oil
6 cloves Garlic — chopped
2 Large Shallots — chopped
2 ounces Ginger — peeled and chopped
2 stalks Lemongrass — chopped
2 each Kaffir Lime Leaves
1/2 Cup Rice Vinegar
1/2 Cup Mirin
2 Tbsp Red Curry Paste
2 Cans Coconut Milk — (or a total of 16 ounces)
1 ounce Cornstarch
1/2 bunch Cilantro — chopped to a mince
2 each Limes — juiced
Procedure:
In a small saucepan, add Sesame Oil and lightly saute the Garlic, Shallots, Ginger and Lemongrass until translucent (do not brown). Add the Kaffir Lime Leaves, Rice Vinegar and Mirin and continue cooking until the liquid is reduced by half.
Stir in the Red Curry Paste and Coconut Milk and bring to a boil. Thicken to ‘sauce’ consistency by adding the Cornstarch and make sure that it has dissolved completely. Steep in Cilantro and add in the Lime Juice. Allow this to sit momentarily as you would if making a cup of tea, this will allow the Cilantro to release it’s flavor.
Strain the sauce through a very fine sieve or a fine china cap.
The sauce is ready and delicious!!!
Serving with Lobster Shooters:
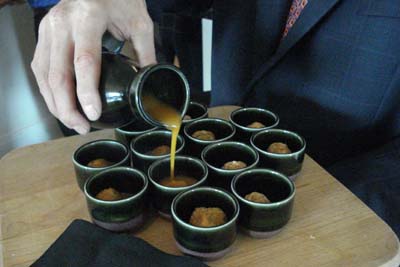
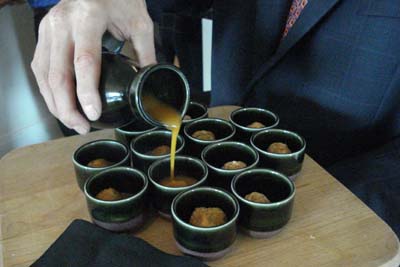
I am not trying to sound repetitious here, but pour the sauce in to a Sake’ Set Carafe and place a Lobster Dumpling in to each of the cups. Pour the piping hot sauce over the dumpling and ‘shoot it’! There is just no other word than Marvelous…….
My thanks again to Chef Kent Rathbun of ABACUS Restaurant in Dallas, Texas for sharing this recipe with me so many years ago…..
ENJOY from JW8.
Lobster Scallion Shooters
If you haven’t been fortunate enough to eat at ABACUS in Dallas, Texas, then you have not experienced Nirvana!!! I have had this recipe for over ten years and rarely share it, but since Kent Rathbun has contributed it to the Neiman Marcus cookbook the secret is already out!!! This is one of my very favorite foods and serving it in a Sake’ set is just plain classy….. Here you go!
ABACUS Restaurant’s Lobster Scallion Shooters
Serve with Red Coconut Curry Cream…..
Ingredients:
2 ounces Sesame Oil
4 cloves Garlic — minced
2 each Shallot — minced
1 stalk Lemongrass — minced
2 ounces Ginger — peeled and minced
1 pound Lobster Meat — chopped fine
4 Tbsp Tamari Soy Sauce
2 Tbsp Sambal Chili Sauce
1 bunch Scallion — chopped
2 Tbsp Mint — chopped
2 Tbsp Basil — chopped
32 pieces Dumpling Wrappers
2 each Eggs — whipped
3 Cups Peanut Oil
Procedure:
In a medium saute’ pan, saute’ in Sesame Oil the Garlic, Shallots, Lemongrass and Ginger until slightly browned. Remove from heat and transfer to a mixing bowl.
Fold in Lobster Meat, Soy Sauce, Sambal, Scallions, Mint and Basil.
Lay out Dumpling Wrappers evenly on a flat surface and then brush a thin layer of egg on each wrapper. Place a small amount of the Lobster mixture in the center of the wrapper. Fold the edges of the wrapper up around the mixture and squeeze the edges to seal the dumpling.
Heat Peanut Oil to 350 degrees (F) and deep fry the dumplings until golden brown.
To Serve:
A Sake’ set makes the perfect presentation by placing a Lobster Dumpling in each of the Sake Cups and filling the carafe with Red Coconut Curry Cream! I am posting the Cream Recipe next to this and it is a must!!
Or, if you’re in the Dallas area make a trip to ABACUS restaurant instead to have this wonderful starter along with Kent’s fantastic other offerings. Thank you Kent for the recipe, I have made it so many times and am completely in awe with each bite. WONDERFUL!!!
ABACUS is located at 4511 McKinney Avenue in uptown Dallas (Knox/Henderson area). Reservations can be made at 214- 559 – 3111.
Homemade Irish Cream
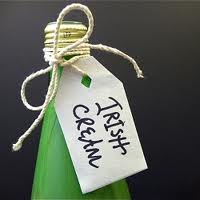
I remember getting my first bottle of Homemade Irish Cream from a coworker at the Bank, Jill P.. It was such a thoughtful gift, that I added it to my recipes the very next year… Homemade Irish Cream is Superior to any bottled and shelved liqueur that money can buy, freshness counts here…
Homemade Irish Cream Liqueur
Ingredients:
1 pint Half and Half
2 Eggs
1 1/2 Cups Irish Whiskey (Jameson is great, although Canadian Club works well too)
2 Tbsp Chocolate Syrup
1 dash Cinnamon
1 tsp Vanilla
Easy – Easy – Easy — Here’s How To Do It :::::
Blend everything together until well mixed, nice, smooth and frothy!
Serve COLD.
Store up to two weeks in the refrigerator, but it’s never lasted that long in my house!
Homemade Kahlua
Homemade Kahlua is great any time of the year, but especially during the Holidays…. It is easy and quick to make and tastes every bit as good as premiums bought at the store.
Homemade Kahlua
Ingredients:
6 Cups Sugar
6 Cups Water
20 tsp Instant Coffee
1/2 gallon Premium Vodka
12 tsp Pure Vanilla
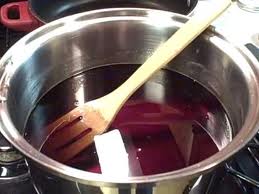
In a large pan, mix Sugar, Water and Coffee together and bring to a slow boil. Turn the heat down and simmer for 1 hour, this concentrates the flavors so be patient and keep an eye on it! Remove from the heat and allow it to cool enough to cover with plastic wrap. The plastic wrap should sit on top of the liquid.
Let this sit covered for 12 hours…..
Carefully remove the plastic wrap (the wrap will remove the top layer of skin that has formed on top of the liquid). Add the Vodka and Vanilla and stir well.
Bottle mixture in to preferably dark bottles, cork and label. That’s it!
Notes: Yields 3 quarts. Drinkable immediately. I usually make a half batch since it makes so much and is so easy to to do again….
Enjoy. That’s Homemade Kahlua from JW8…
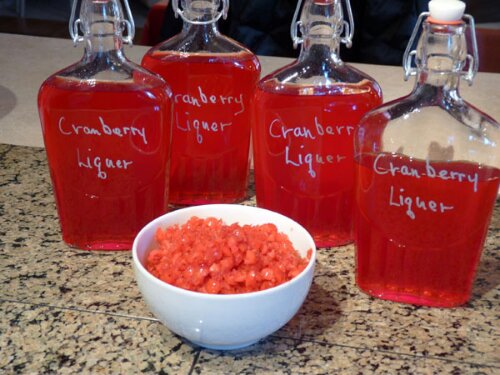
Homemade Cranberry Liqueur
Keeping in the ‘Spirit’ of the Holidays…. Here is my recipe for my Homemade Cranberry Liqueur that so many of you have had at my home in Farmers Branch and received as that year’s gift du jour…..
Homemade Cranberry Liqueur Recipe
(this is not a quick recipe)
Here is what you’ll need:
Ingredients:
16 oz Cranberries
1 1/2 Cups Premium Vodka (I use Ketel One)
1 1/2 Cups Sugar
3/4 Cup Water
1/2 Lemon or Lime Peel
1/4 Orange Peel
Optional:
1 stick Cinnamon
1/8 tsp Ground Allspice
Tools:
1 1/2 Liter Sealable Jar
1 Sheet Cheesecloth
Large Funnel
Coffee Filters
Apple Corer/Peeler
Bottles (4 Cup Size Works Well)
Here We Go! :::::
First, clean the heck out of your jar! You can’t spend enough time cleaning……
Chop up the Cranberries in a blender or food processor, on the lowest setting, until it’s the consistency of grits. Make sure they are all chopped up; any still ‘Whole’ berry won’t contribute to the liqueur. Pour in to jar.
Using the apple peeler, carefully peel just the rind from your 1/2 lemon or lime and 1/4 orange, and put the peels in to the jar.
Pour Vodka in the jar. If you’re using the optional spices, add them to the mix as well.
NEXT :::::
Boil sugar and water together until the sugar is completely dissolved. Let stand one minute and then measure 1 1/2 Cups in to the jar. Seal the jar quickly, lest the alcohol will evaporate in the heat!
Let this measure steep for 4 weeks, shaking lightly each day. Store in a cool, dry and dark place during this time.
AND THEN :::::
After the month of steeping: Line your funnel with your cheesecloth and pour the liqueur mixture through it to remove all large items. Gather the corners of the cheesecloth and squeeze all of the liquid out completely! The mixture will be ‘Cloudy’ at this point and it is normal.
Thoroughly wash the funnel for the second straining. Line your funnel with the coffee filters and strain the mixture again to remove all of the solids. You may prefer to do this several times, depending on how shiny clear you want the finished product to be… Remember that this is homemade, so it does not have to look like it came from a store but if you are like me then you want it to be perfect! I strain mine twice through this second process….
BEFORE BOTTLING :::::
Clean the HECK out of your bottles! Shake the mixture moderately to redistribute the liqueur.
Pour the liqueur in to your bottles, cork and you are DONE!
DECORATE THE FINISHED PRODUCT!!!
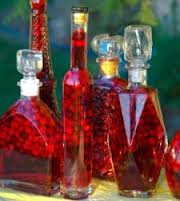
After spending a LOT of TIME, MONEY and EFFORT, you certainly want them to both look professional and homemade. Using unique bottles shows a very classy presentation, and a few whole or halved Cranberries inserted in to the bottles represents that it was freshly made… Have fun with this part and enjoy this AWESOME Liqueur that is sweet and thick like a fine dessert wine. It also makes a lovely cocktail with soda and a splash of S&S….
That’s how JW8 does Cranberry Liqueur…..
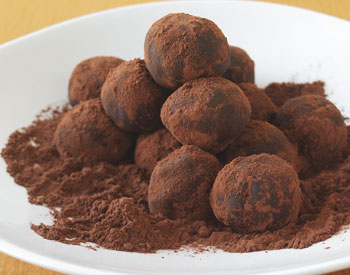
Incredible Cranberry Chocolate Truffles!
To start out, and since this is the Holiday Season…. Here is a recipe that rivals Go-Diva…
Chocolate Cranberry Truffles
(simple and pure)
You will need:
1 Cup Heavy Cream
1/4 tsp Salt
1 Tbsp Butter
10 oz Chopped Bittersweet Chocolate
1 Cup Dried Cranberries
Cocoa
Small Paper Cups
Pour 3/4 Cup Heavy Cream, 1/4 tsp Salt and 1 Tbsp Butter in to a small saucepan and bring almost to a Boil. Remove from heat.
Add 10 oz. chopped Bittersweet Chocolate and 1 Cup Dried Cranberries.
Transfer to a glass bowl and place in the freezer to chill for 30 minutes.
Form by taking about a teaspoon full and rolling in your hands, finish by rolling in Cocoa and placing in a Paper Cup. I use Hershey’s Special Dark Cocoa….
Chill and store in an airtight container!
That’s it. These are incredibly easy to make and delicious… Enjoy and Happy Holidays from JW8…

